Portainer Documentation
Official WebsiteKnowledge BasePricingGet 3 Nodes of BE Free
2.21 LTS
2.21 LTS
  • Welcome
  • What's new in version 2.21
  • Release Notes
  • Getting Started
    • Introduction
    • Portainer architecture
    • Lifecycle policy
    • Requirements and prerequisites
    • Install Portainer BE
      • Set up a new Portainer BE Server installation
        • Docker Standalone
          • Install Portainer BE with Docker on Linux
          • Install Portainer BE with Docker on WSL / Docker Desktop
          • Install Portainer BE with Docker on Windows Container Service
        • Docker Swarm
          • Install Portainer BE with Docker Swarm on Linux
          • Install Portainer BE with Docker Swarm on WSL / Docker Desktop
          • Install Portainer BE with Docker Swarm on Windows Container Service
        • Kubernetes
          • Install Portainer BE on your Kubernetes environment
          • Install Portainer BE with Kubernetes on WSL / Docker Desktop
        • Initial setup
    • Install Portainer CE
      • Set up a new Portainer CE Server installation
        • Docker Standalone
          • Install Portainer CE with Docker on Linux
          • Install Portainer CE with Docker on WSL / Docker Desktop
          • Install Portainer CE with Docker on Windows Container Service
        • Docker Swarm
          • Install Portainer CE with Docker Swarm on Linux
          • Install Portainer CE with Docker Swarm on WSL / Docker Desktop
          • Install Portainer CE with Docker Swarm on Windows Container Service
        • Kubernetes
          • Install Portainer CE on your Kubernetes environment
          • Install Portainer CE with Kubernetes on WSL / Docker Desktop
        • Initial setup
    • Add an environment to an existing installation
    • Updating Portainer
      • Updating on Docker Standalone
      • Updating on Docker Swarm
      • Updating on Kubernetes
      • Updating on Nomad
      • Updating the Edge Agent
      • Updating from Portainer 1.x
      • Switching to Portainer Business Edition
        • Upgrade to Business Edition from within Portainer Community Edition
        • Docker Standalone
        • Docker Swarm
        • Kubernetes
        • Upgrading Agent-only deployments
  • Using Portainer
    • Home
      • Snapshot browsing
      • OpenAMT
    • Docker/Swarm
      • Dashboard
      • Templates
        • Application
        • Custom templates
        • Deploy a stack
        • Deploy a container
      • Stacks
        • Add a new stack
        • Inspect or edit a stack
        • Create a template from a deployed stack
        • Webhooks
        • Migrate or duplicate a stack
        • Remove a stack
      • Services
        • Add a new service
        • Configure service options
        • Scale a service
        • View the status of a service task
        • View service logs
        • Roll back a service
        • Webhooks
      • Containers
        • Add a new container
        • View a container's details
        • Inspect a container
        • Edit or duplicate a container
        • Advanced container settings
        • Webhooks
        • Attach a volume to a container
        • View container logs
        • View container statistics
        • Access a container's console
        • Change container ownership
        • Remove a container
      • Images
        • Pull an image
        • Build a new image
        • Import an image
        • Export an image
      • Networks
        • Add a new network
        • Remove a network
      • Volumes
        • Add a new volume
        • Browse a volume
        • Remove a volume
      • Configs
        • Add a new config
        • Remove a config
      • Secrets
        • Add a new secret
        • Remove a secret
      • Events
      • Host
        • Details
        • Setup
        • Registries
      • Swarm
        • Details
        • Cluster visualizer
        • Setup
        • Registries
    • Kubernetes
      • Dashboard
      • kubectl shell
      • Kubeconfig
      • Custom Templates
        • Add a new custom template
        • Edit a custom template
        • Remove a custom template
      • Namespaces
        • Add a new namespace
        • Manage a namespace
        • Manage access to a namespace
        • Remove a namespace
      • Helm
      • Applications
        • Add a new application using a form
        • Add a new application using a manifest
        • Inspect an application
        • Inspect a Helm application
        • Edit an application
        • Webhooks
        • Detach a volume from an application
        • Remove an application
      • Networking
        • Services
        • Ingresses
          • Add an Ingress manually
          • Add an Ingress using a manifest
          • Remove an Ingress
      • ConfigMaps & Secrets
        • Add a ConfigMap
        • Add a Secret
      • Volumes
        • Inspect a volume
        • Remove a volume
      • More Resources
        • Service Accounts
        • Cluster Roles
        • Roles
      • Cluster
        • Details
        • Inspect a node
        • Setup
        • Security constraints
        • Registries
    • Azure ACI
      • Dashboard
      • Container instances
        • Add a new container
        • Remove a container
    • Nomad
    • Edge Compute
      • Edge Groups
      • Edge Stacks
        • Add a new Edge Stack
      • Edge Jobs
      • Edge Configurations
      • Waiting Room
      • Edge Templates
        • Application
        • Custom
    • Account settings
  • Administering Portainer
    • User-related
      • Users
      • Add a new user
      • Turn a user into an administrator
      • Reset a user's password
      • Teams
        • Add a new team
        • Add a user to a team
      • Roles
    • Environment-related
      • Environments
      • Add a new environment
        • Add a local environment
        • Add a Docker Standalone environment
          • Install Portainer Agent on Docker Standalone
          • Connect to the Docker API
          • Connect to the Docker Socket
          • Install Edge Agent Standard on Docker Standalone
          • Install Edge Agent Async on Docker Standalone
        • Add a Docker Swarm environment
          • Install Portainer Agent on Docker Swarm
          • Connect to the Docker API
          • Connect to the Docker Socket
          • Install Edge Agent Standard on Docker Swarm
          • Install Edge Agent Async on Docker Swarm
        • Add a Kubernetes environment
          • Install Portainer Agent on your Kubernetes environment
          • Install Edge Agent Standard on Kubernetes
          • Install Edge Agent Async on Kubernetes
          • Import an existing Kubernetes environment
        • Add an ACI environment
        • Add a Nomad environment
        • Provision KaaS Cluster
          • Civo
          • Akamai Connected Cloud
          • DigitalOcean
          • Google Cloud
          • AWS
          • Azure
        • Create a Kubernetes cluster
          • MicroK8s
            • Offline installation
        • Add an environment via the Portainer API
      • Auto onboarding
      • Groups
      • Tags
      • Manage access to environments
      • Manage access to environment groups
      • Update & Rollback
    • Registries
      • Add a new registry
        • Add a DockerHub account
        • Add an AWS ECR registry
        • Add a Quay.io registry
        • Add a ProGet registry
        • Add an Azure registry
        • Add a Gitlab registry
        • Add a GitHub registry
        • Add a custom registry
      • Browse a registry
      • Manage a registry
    • Licenses
    • Logs
      • Authentication
      • Activity
    • Notifications
    • Settings
      • General
      • Authentication
        • Authenticate via LDAP
        • Authenticate via Active Directory
        • Authenticate via OAuth
      • Shared credentials
        • Add Civo credentials
        • Add Akamai Connected Cloud credentials
        • Add DigitalOcean credentials
        • Add Google Cloud credentials
        • Add AWS credentials
        • Add Azure credentials
        • Add SSH credentials
      • Edge Compute
  • Frequently Asked Questions
    • Portainer Concepts
    • Installing
    • Upgrading
    • Troubleshooting
    • Contributing
  • Advanced Topics
    • CLI configuration options
    • App templates
      • Build and host your own app templates
      • App template JSON format
    • The Portainer Edge Agent
    • Access control
    • Reset the admin user's password
    • Security and compliance
    • Encrypting the Portainer database
    • Using your own SSL certificate with Portainer
    • Using mTLS with Portainer
    • Stream auth and activity logs to an external provider
    • Using Portainer with reverse proxies
      • Deploying Portainer behind Traefik Proxy
      • Deploying Portainer behind nginx reverse proxy
    • How Relative Path Support works in Portainer
    • Helm chart configuration options
    • Docker roles and permissions
    • Kubernetes roles and bindings
    • Deprecated and removed features
  • API
    • Accessing the Portainer API
    • API documentation
    • API usage examples
  • Get More Help
    • Knowledge Base
    • Portainer Academy
    • YouTube
    • GitHub
    • Slack
    • Discord
    • Open a support request
  • Contribute to Portainer
    • Contribute
    • Build instructions
      • Set up a macOS build environment
      • Set up a Linux build environment
Powered by GitBook
On this page
  • Options when deploying a new stack
  • Option 1: Web editor
  • Option 2: Upload
  • Option 3: Git repository
  • GitOps updates
  • Relative path volumes
  • Environment variables

Was this helpful?

Edit on GitHub
  1. Using Portainer
  2. Docker/Swarm
  3. Stacks

Add a new stack

PreviousStacksNextInspect or edit a stack

Was this helpful?

Options when deploying a new stack

There are four ways to deploy a new stack from Portainer:

Option
Overview

Use our web editor to define the services for the stack using a docker-compose format.

If you have a stack.yml file, you can upload it from your computer and use it to deploy the stack.

You can use a docker-compose format file hosted in a Git repository.

Custom template

Option 1: Web editor

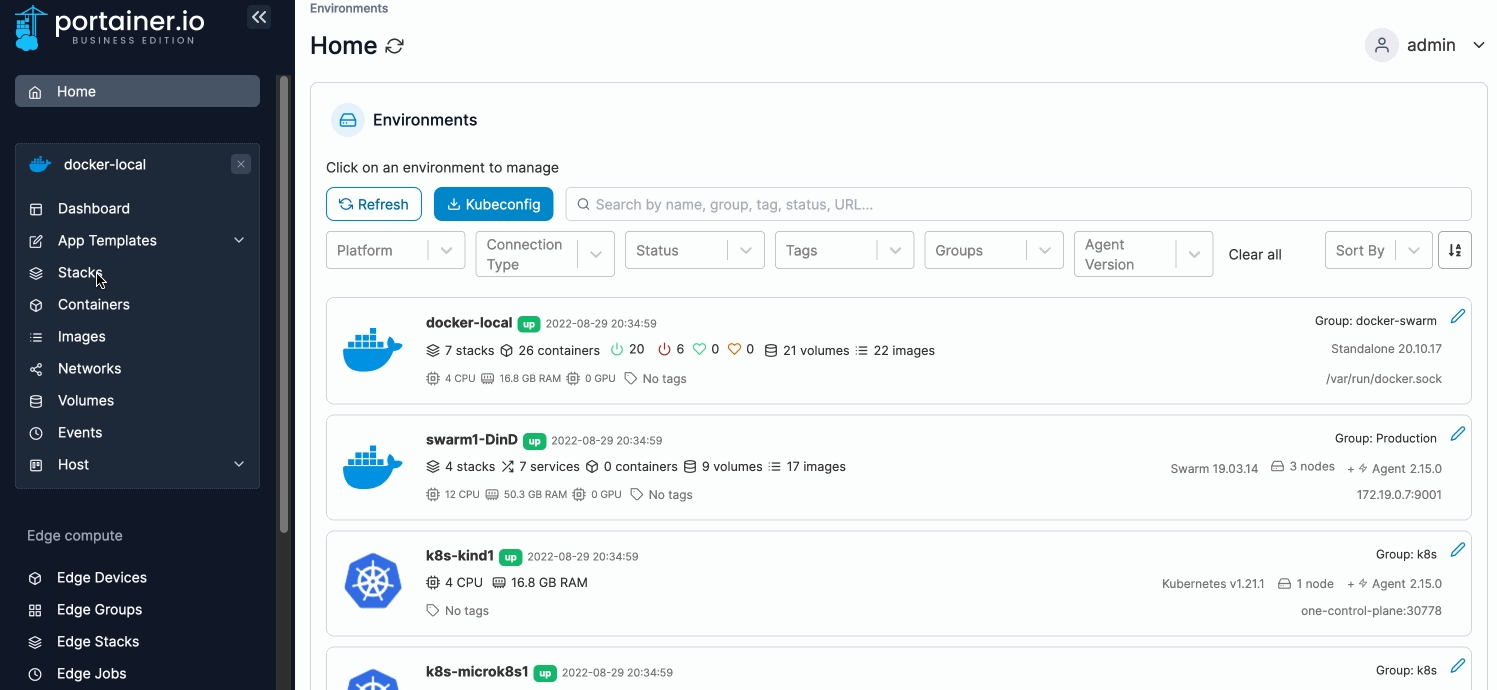
From the menu select Stacks, click Add stack, give the stack a descriptive name then select Web editor. Use the web editor to define the services.

You can search within the web editor at any time by pressing Ctrl-F (or Cmd-F on Mac).

As an optional step, you can also use the web editor to define environment variables. You can use these to define values in your compose file that would vary between deployments (for example, hostnames, database names, etc).

Environment variables can be set individually within Portainer or you can use Load variables from .env file to upload a file containing your environment variables. Environment variables you define (either individually or via a .env file) will be available to use in your compose file using an environment definition:

environment:
  MY_ENVIRONMENT_VARIABLE: ${MY_ENVIRONMENT_VARIABLE}

Alternatively, on Docker Standalone environments you can add stack.env as an env_file definition to add all the environment variables that you have defined individually as well as those included in an uploaded .env file:

env_file:
  - stack.env

Note: Using env_file to define a file does not work in Docker Swarm due to the lack of env_file support in docker stack deploy (used on Swarm environments to deploy your stack). On Docker Swarm, you will need to define each environment variable manually.

Note the compose file is not changed when environment variables are used - this allows variables to be updated within Portainer without editing the compose file itself. You will still see the ${MY_ENVIRONMENT_VARIABLE} style entry in the compose file.

When you're ready, click Deploy the stack.

Option 2: Upload

In Portainer you can create stacks from Compose YML files. To do this, from the menu select Stacks, click Add stack, then give the stack a descriptive name.

Select Upload then select the Compose file from your computer.

As an optional step, enter any environment variables. You can use these to define values in your compose file that would vary between deployments (for example, hostnames, database names, etc).

Environment variables can be set individually within Portainer or you can use Load variables from .env file to upload a file containing your environment variables. Environment variables you define (either individually or via a .env file) will be available to use in your compose file using an environment definition:

environment:
  MY_ENVIRONMENT_VARIABLE: ${MY_ENVIRONMENT_VARIABLE}

Alternatively, you can add stack.env as an env_file definition to add all the environment variables that you have defined individually as well as those included in an uploaded .env file:

env_file:
  - stack.env

Note the compose file is not changed when environment variables are used - this allows variables to be updated within Portainer without editing the compose file itself which would take it out of sync with your local copy. You will still see the ${MY_ENVIRONMENT_VARIABLE} style entry in the compose file.

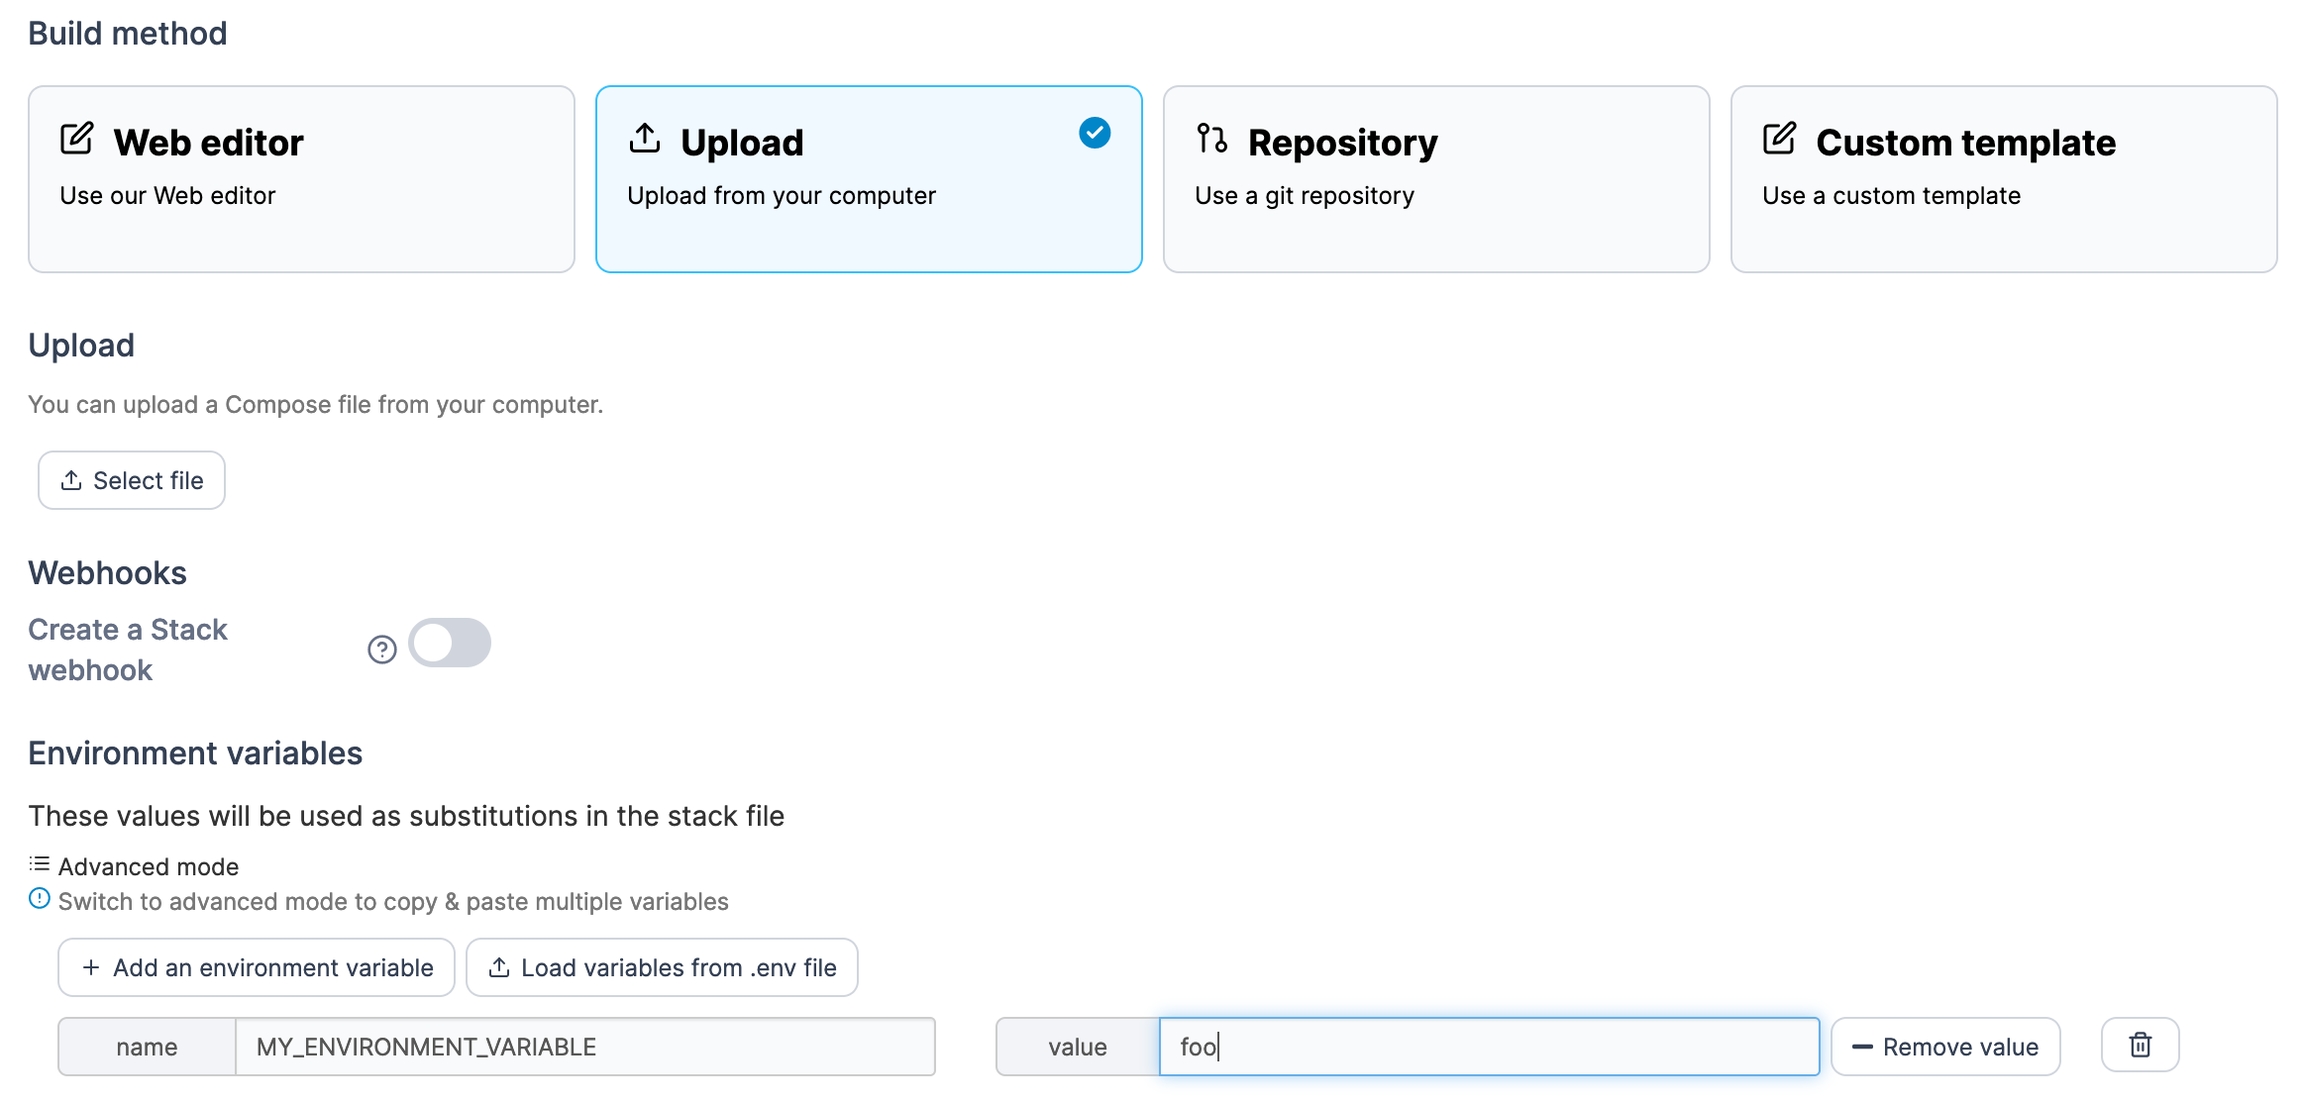
When you're ready click Deploy the stack.

Option 3: Git repository

If your Compose file is hosted in a Git repository, you can deploy from there. From the menu select Stacks, click Add stack, then give the stack a descriptive name.

When a stack is deployed from Git, Portainer will clone the entire Git repository as part of the deployment process. Ensure you have enough free space to accommodate this.

Select Git Repository then enter information about your Git repo.
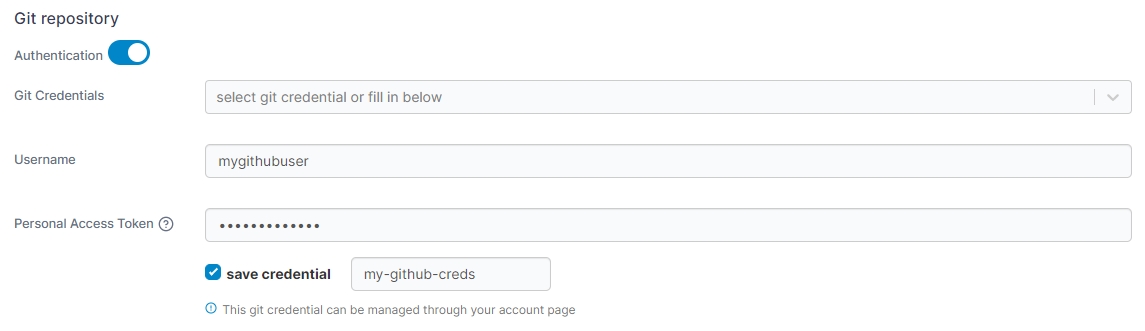
Any Git-compatible repository should work here. Substitute the details as required.

Field/Option
Overview

Authentication

Toggle this on if your Git repository requires authentication.

Git Credentials

Username

Enter your Git username.

Personal Access Token

Enter your personal access token or password.

Save credential

Check this option to save the credentials entered above for future use under the name provided in the credential name field.
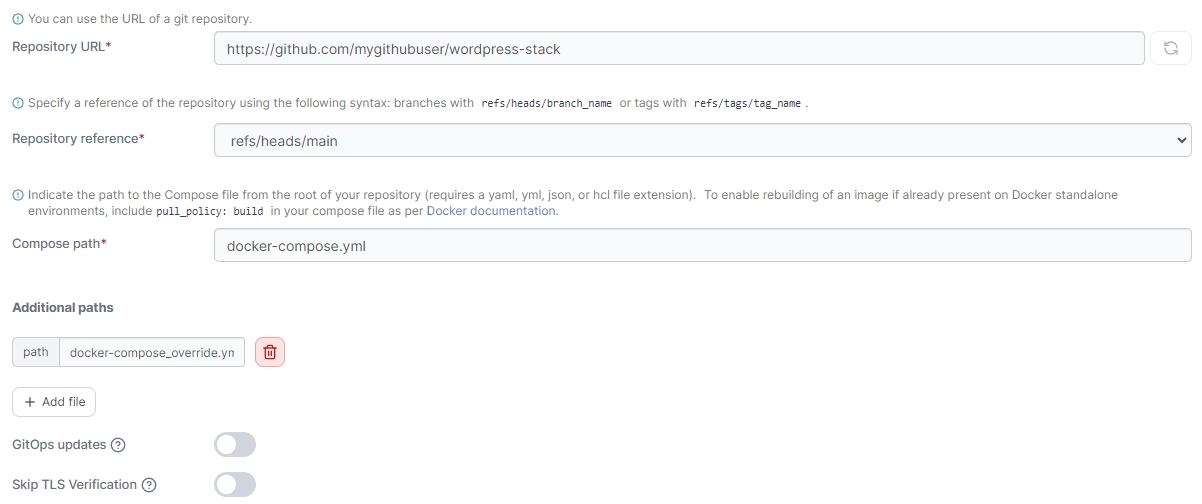
If you have 2FA configured in GitHub, your passcode is your password.

Field/Option
Overview

Repository URL

Enter the repository URL. If you have enabled Authentication above the credentials will be used to access the repository. The below options will be populated by what is found in the repository.

Repository reference

Select the reference to use when deploying the stack (for example, the branch).

Compose path

Enter the path to the Compose file from the root of the repository.

Additional paths

Click Add file to add additional files to be parsed by the build (for example, an environment-specific compose file).

GitOps updates

Toggle this on to enable GitOps updates (see below).

Skip TLS verification

Toggle this on to skip the verification of TLS certificates used by your repository. This is useful if your repo uses a self-signed certificate.
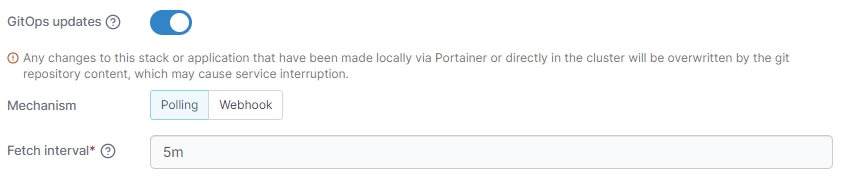
GitOps updates

Portainer supports automatically updating your stacks deployed from Git repositories. To enable this, toggle on GitOps updates and configure your settings.

Field/Option
Overview

Mechanism

Select the method to use when checking for updates:

Polling: Periodically poll the Git repository from Portainer to check for updates to the repository.

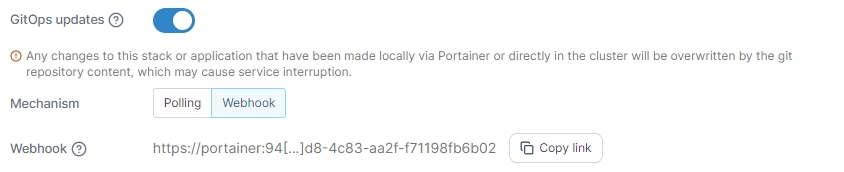
Webhook: Generate a webhook URL to add to your Git repository to trigger the update on demand (for example via GitHub actions).

Fetch interval

If Polling is selected, how often Portainer will check the Git repository for updates.

Webhook

When Webhook is selected, displays the webhook URL to use in your integration. Click Copy link to copy the webhook URL to the clipboard.

Field/Option
Overview

Re-pull image

Enable this setting to always pull the most recent version of container images when updating the stack. This is equivalent to the --pull=always flag for docker run. This option was previously labeled as Pull latest image.

Force redeployment

Enable this setting to force the redeployment of your stack at the specified interval (or when the webhook is triggered), overwriting any changes that have been made in the local environment, even if there has been no update to the stack in Git. This is useful if you want to ensure that your Git repository is the source of truth for your stacks and are happy with the local stack being replaced.

If this option is left disabled, automatic updates will only trigger if Portainer detects a change in the remote Git repository.

Relative path volumes

When you toggle Enable relative path volumes to on, you are able to specify relative path references in your compose files. Portainer will create the required directory structure and populate the directories with the relevant files from your Git repository.

This feature is only available in Portainer Business Edition.

On Docker Standalone environments, specify the path at which you want your files to be created on your host filesystem in the Local filesystem path field.

Ensure this directory exists on your local filesystem and is writable.

On Docker Swarm environments, specify the path at which you want your files to be created in the Network filesystem path field.

Ensure that this path is available on all of your Docker Swarm nodes and is writable.

Environment variables

As an optional step, you can also set environment variables. You can use these to define values in your compose file that would vary between deployments (for example, hostnames, database names, etc).

Environment variables can be set individually within Portainer or you can use Load variables from .env file to upload a file containing your environment variables. Environment variables you define (either individually or via a .env file) will be available to use in your compose file using an environment definition:

environment:
  MY_ENVIRONMENT_VARIABLE: ${MY_ENVIRONMENT_VARIABLE}

Alternatively, you can add stack.env as an env_file definition to add all the environment variables that you have defined individually as well as those included in an uploaded .env file:

env_file:
  - stack.env

Note the compose file is not changed when environment variables are used - this allows variables to be updated within Portainer without editing the compose file itself which would take it out of sync with the Git repository. You will still see the ${MY_ENVIRONMENT_VARIABLE} style entry in the compose file.

Enter environment variables if required then click Deploy the stack.

If you have created a , you can deploy using this option.

As part of the stack creation you can enable a stack webhook, allowing you to remotely trigger redeployments of the stack from your repository, for example. You can read more on this in our documentation on .

As part of the stack creation you can enable a stack webhook, allowing you to remotely trigger redeployments of the stack from your repository, for example. You can read more on this in our documentation on .

Portainer's Git deployment functionality does not currently support the use of Git submodules. If your repository includes submodules, they will not be pulled as part of the deployment. We for submodules in a future release.

If the Authentication toggle is enabled and you have , you can select them from this dropdown.

For more detail on how GitOps updates function under the hood, have a look at .

For more detail on how this feature works, have a look at .

stack webhooks
stack webhooks
hope to add support
this knowledge base article
this article
custom stack template
Web editor
Upload
Git repository
configured Git credentials
Automatic updates when using polling
Automatic updates when using webhooks