Authenticate via OAuth
Configuring OAuth authentication in Portainer
From the menu select Settings then select Authentication. Under the Authentication method section click OAuth.
In the next screen, enter the credentials provided by your OAuth provider, using the table below as a guide.
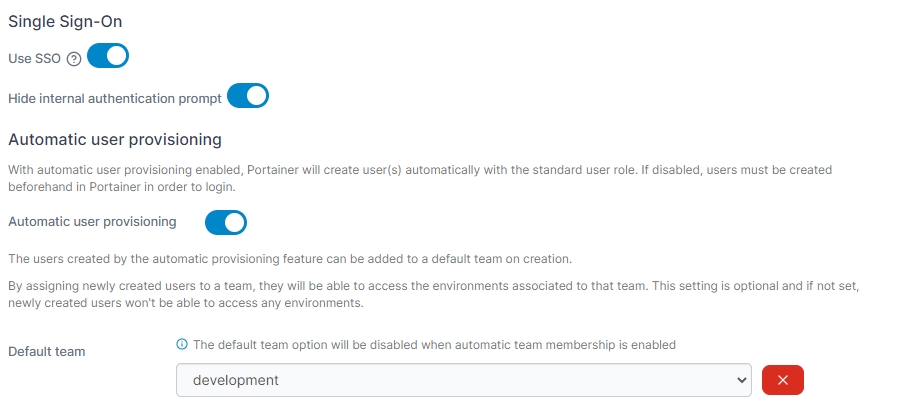
Use SSO
Enable SSO so that the OAuth provider won't be forced to ask for credentials when users are in a current logged-in session.
Hide internal authentication prompt
Hide the ability to log in through internal authentication. Note that when external authentication is enabled, only the initial admin user can log in with internal auth.
Automatic user provisioning
If toggled on, users who exist at the OAuth provider's end will automatically be created in Portainer (you can define a default team to put those users in while this option is on). If toggled off, you'll need to create users in Portainer manually.
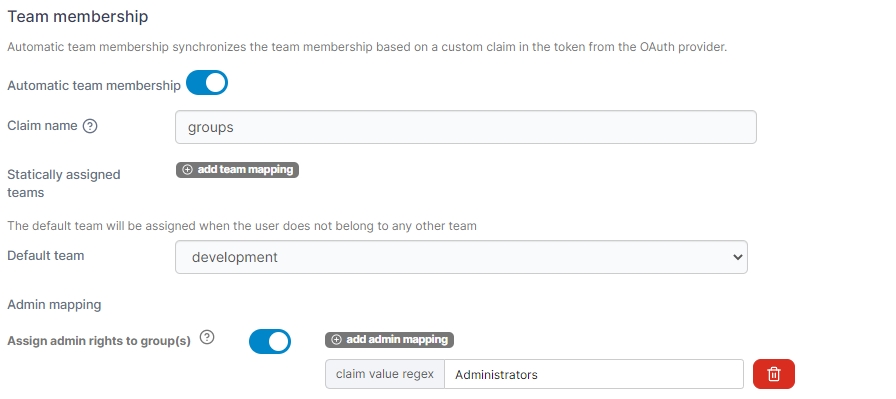
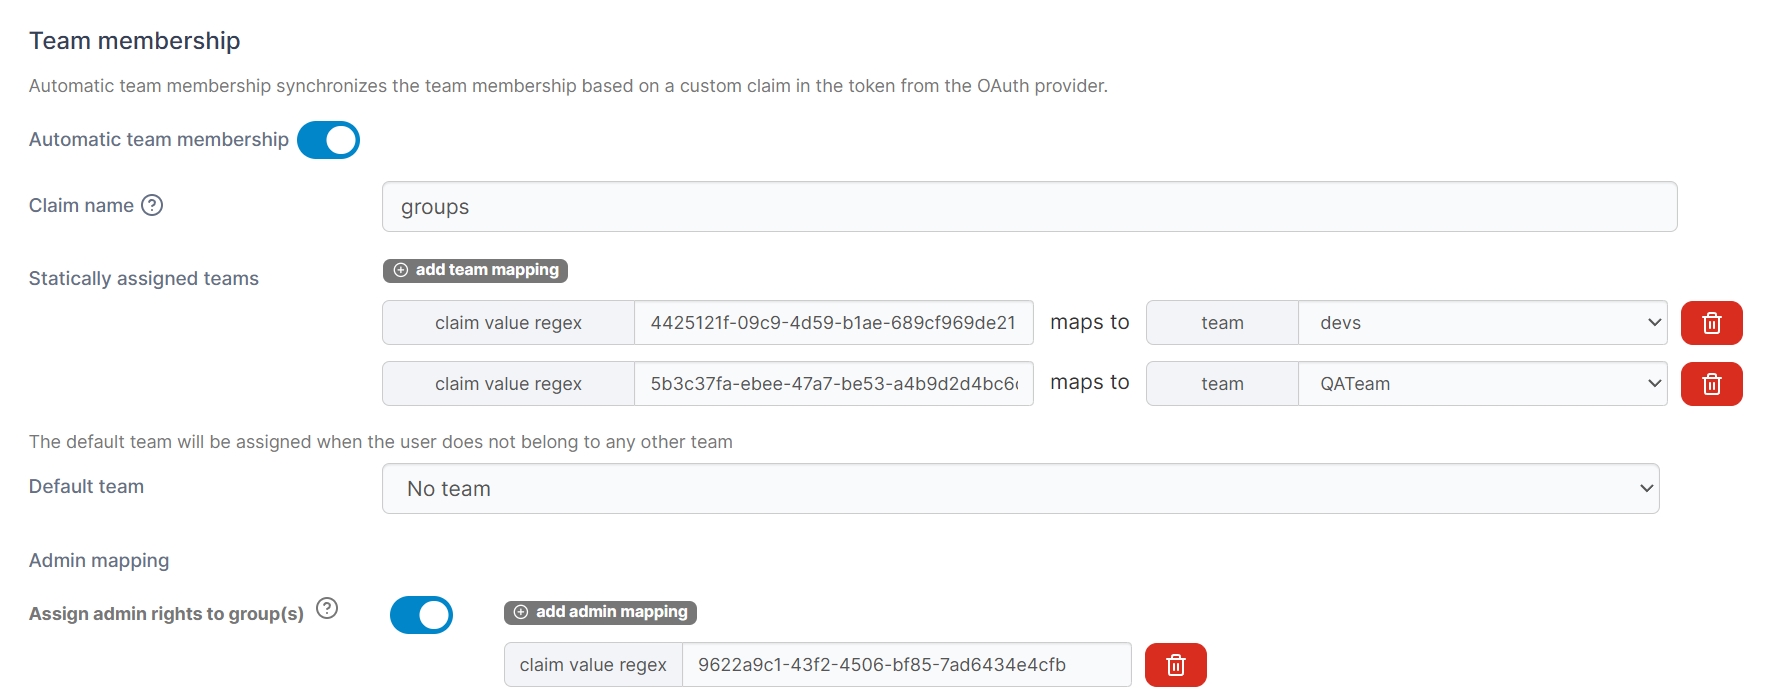
If you toggle Automatic team membership on, you can choose to automatically add OAuth users to certain Portainer teams based on the Claim name. Claim names will be matched with teams or you can manually link a claim name (using regex) with Portainer teams under the Statically assigned teams option. You can also define a Default team for users who don't belong to any other team.
In addition, you can enable the automatic assignment of admin rights to specified groups if desired.
When configuring Microsoft Entra ID (Azure AD) as the OAuth provider, you will need to use the group's Object Id value for the claim value regex instead of the group name:
OAuth providers
Portainer provides pre-configured OAuth provider options or you can set up your own custom OAuth provider. Each of the pre-configured providers can have their configuration overridden if you need to make changes to the Portainer defaults.
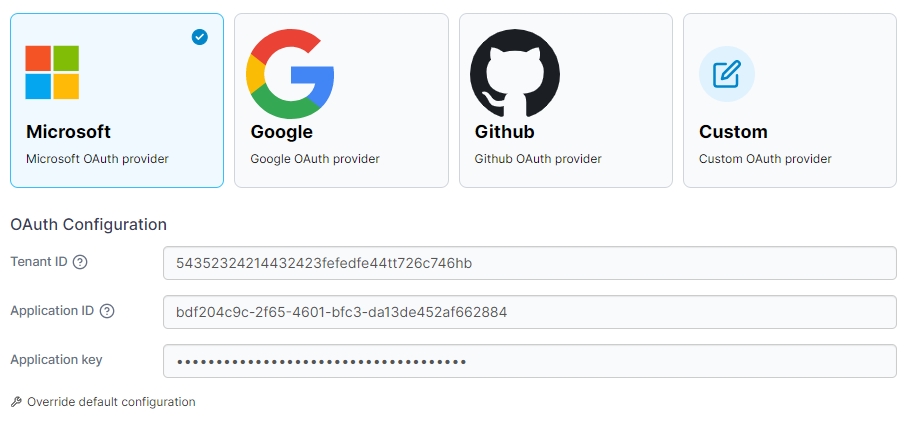
Microsoft
Configure your OAuth provider using the table below as a guide.
Tenant ID
Enter the ID of the Azure Directory you wish to authenticate against. This is also known as the Directory ID.
Application ID
Enter the public identifier of the OAuth application.
Application key
Enter the secret key for the OAuth application.
You can find these details using the following steps:
Log in to your Azure Portal as an administrator.
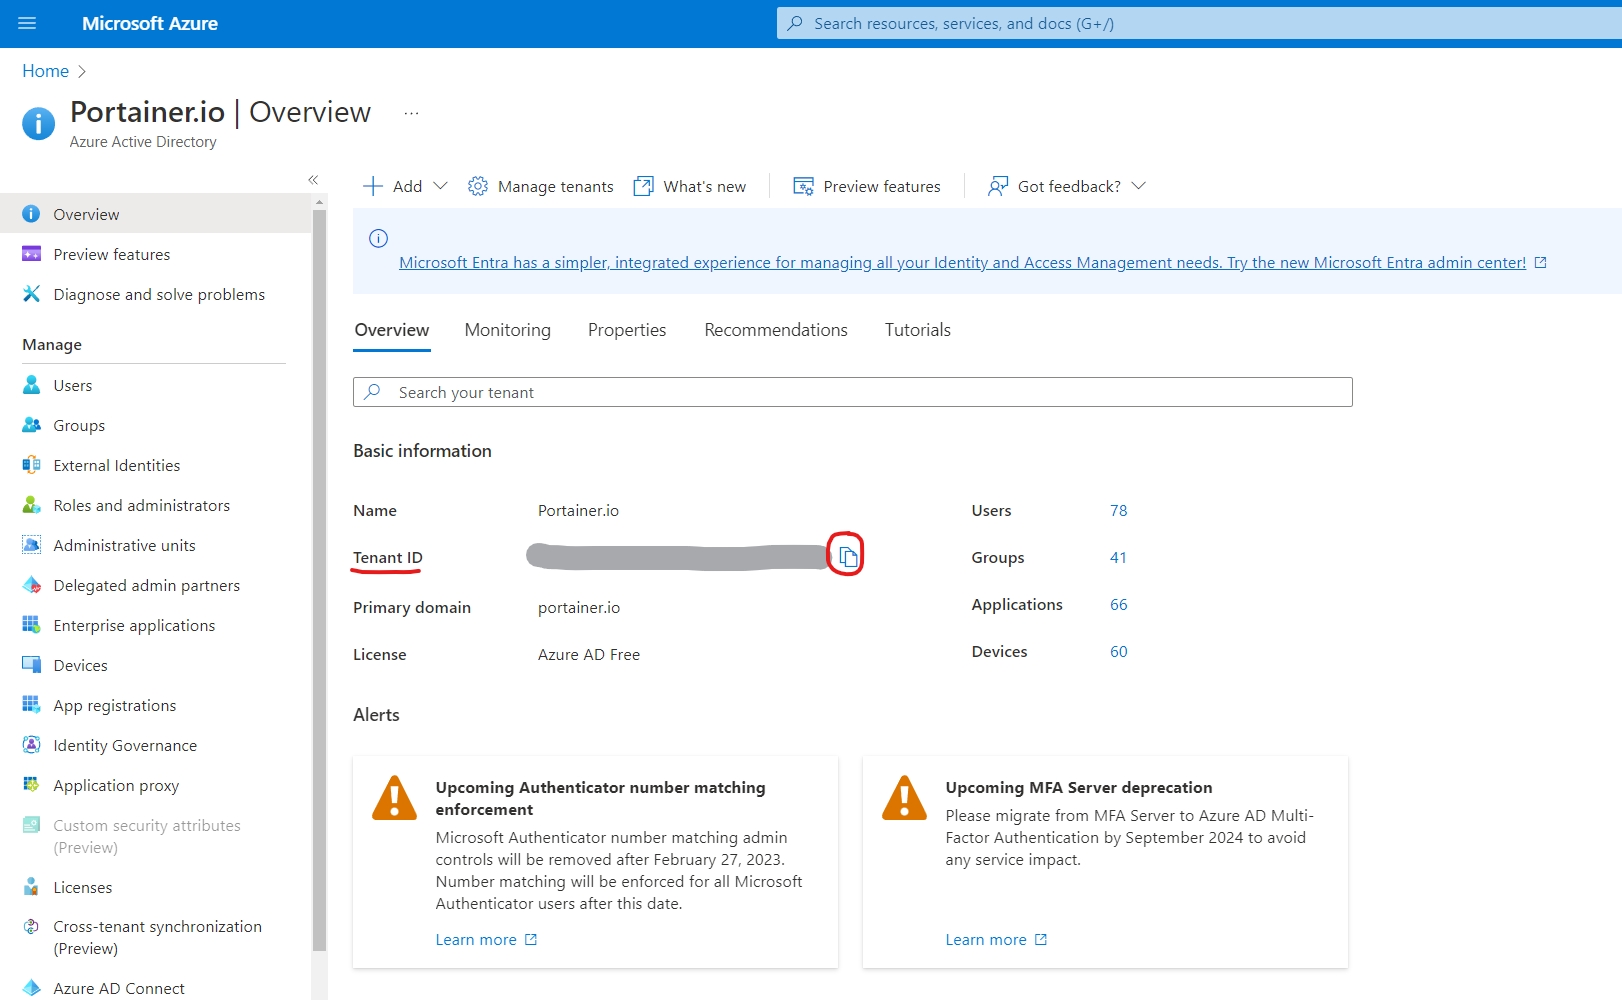
Click on Azure Active Directory and then click on Overview. Your Tenant ID can be found in the right pane. Use this as the Tenant ID in Portainer.
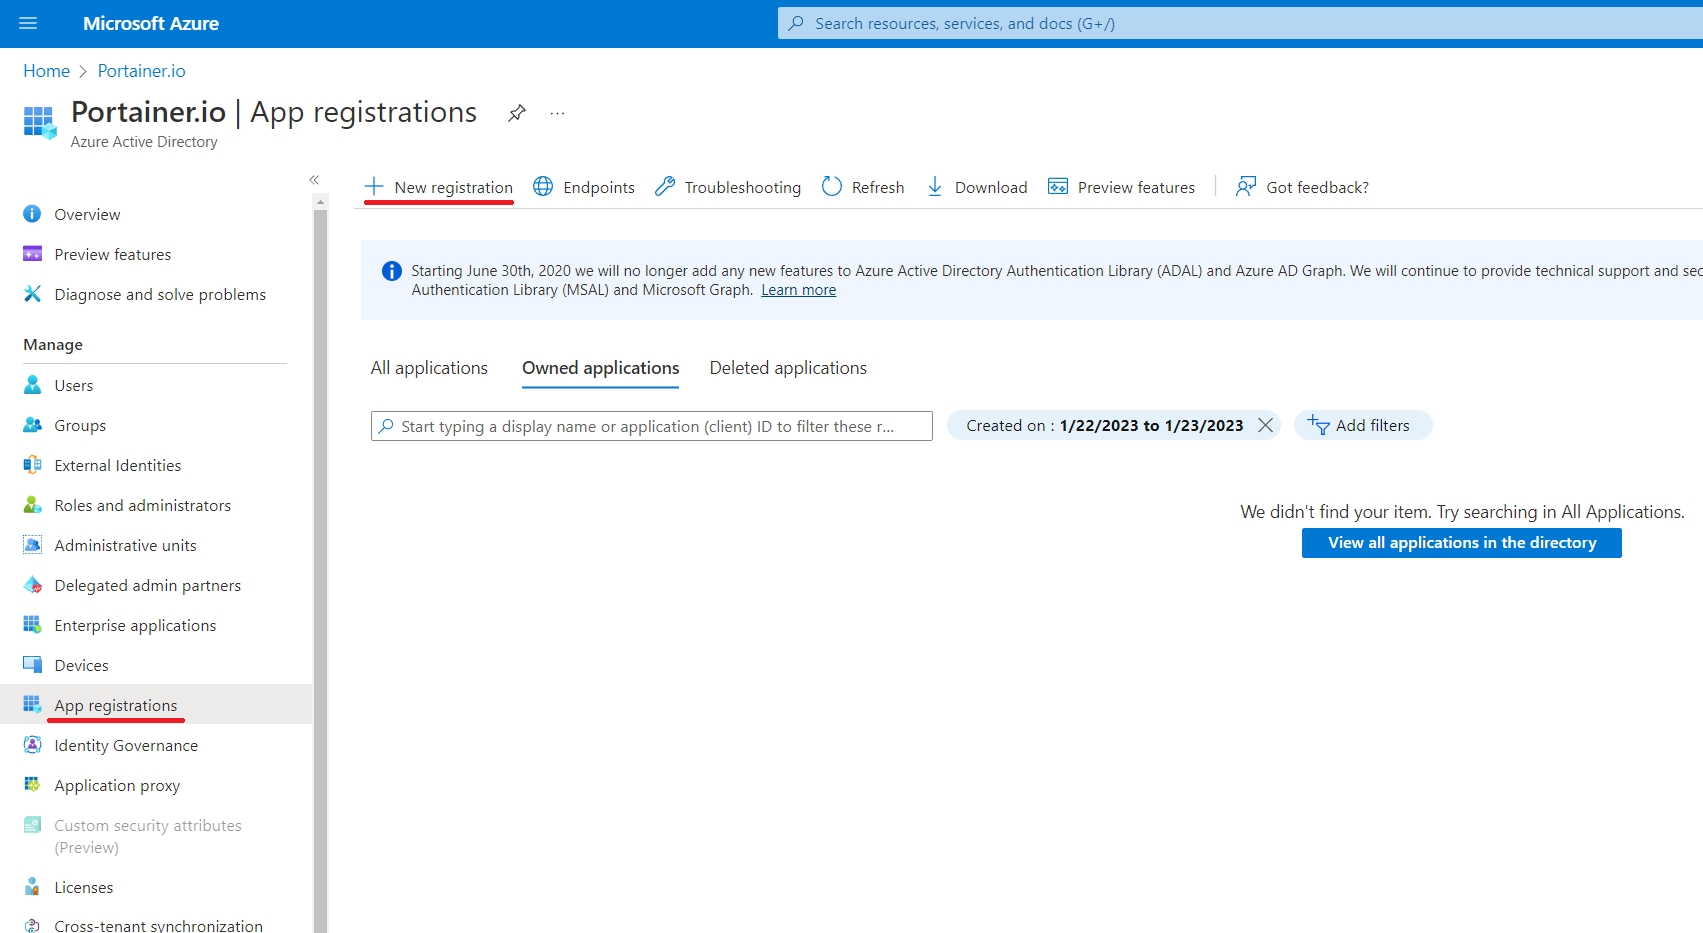
Still in Azure Active Directory, click on App Registrations then click New registration.
Enter a friendly name for the Portainer instance. Choose appropriate option for Supported account types, Choose
Webtype for Redirect URI and enter the FQDN or IP address that your Portainer instance listens oneg: https://portainer.example.com:9443. Then click Register.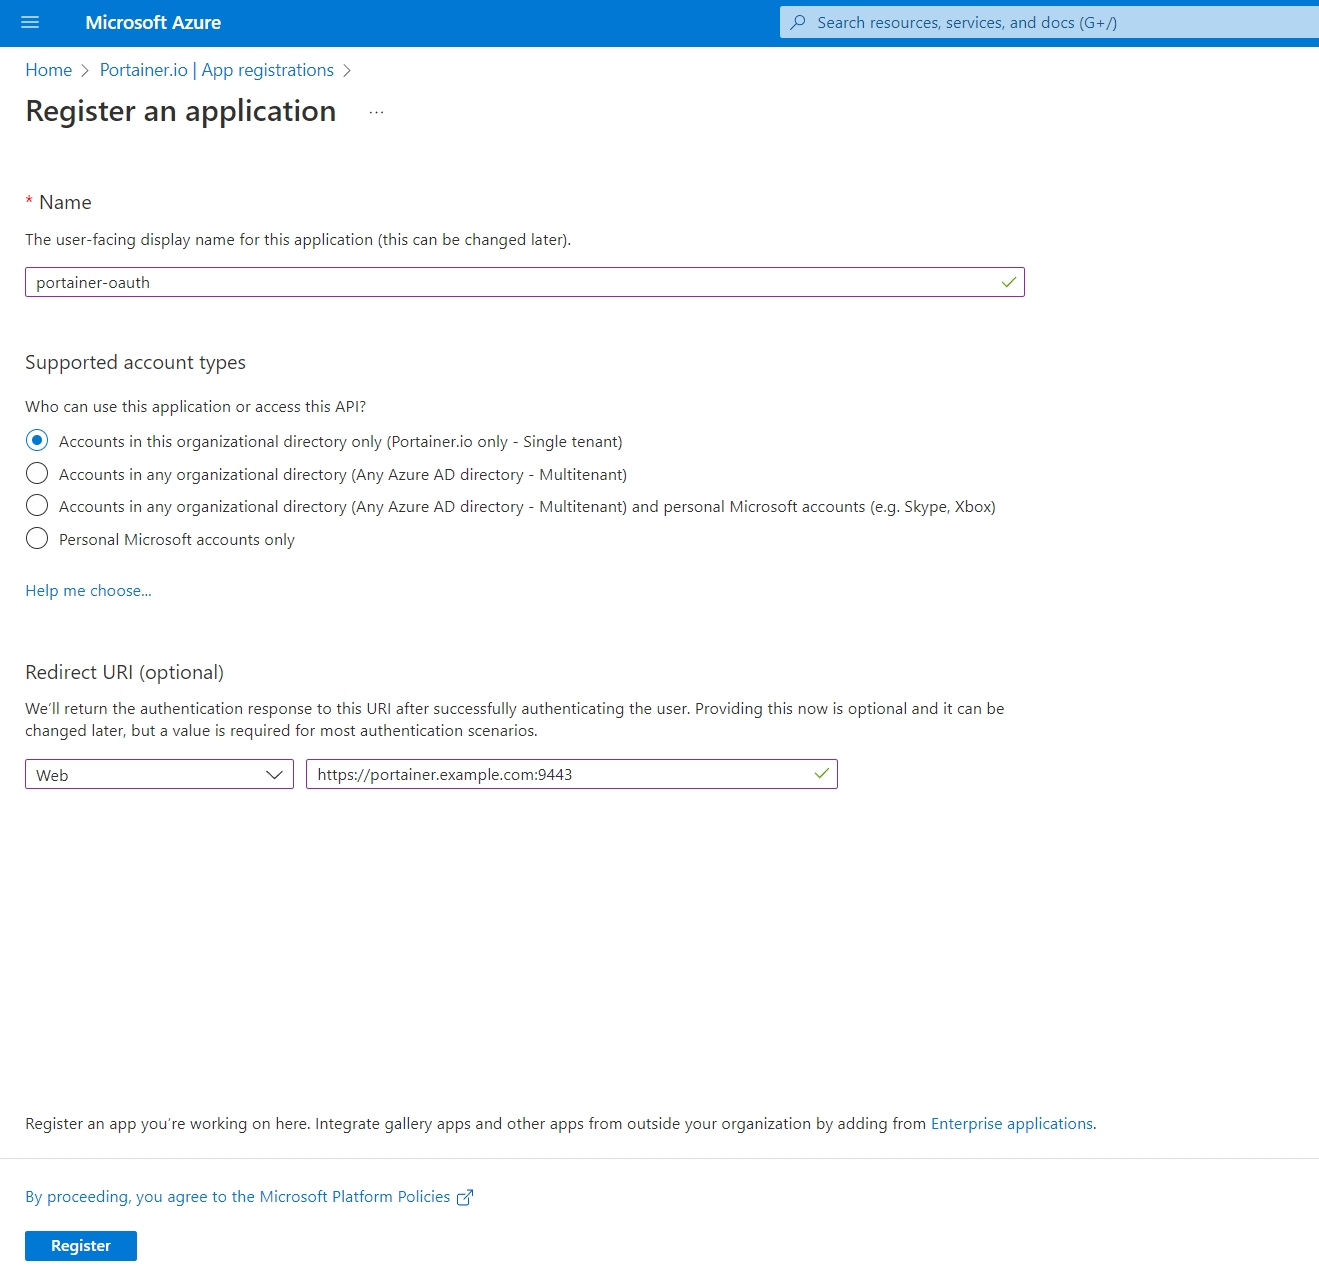
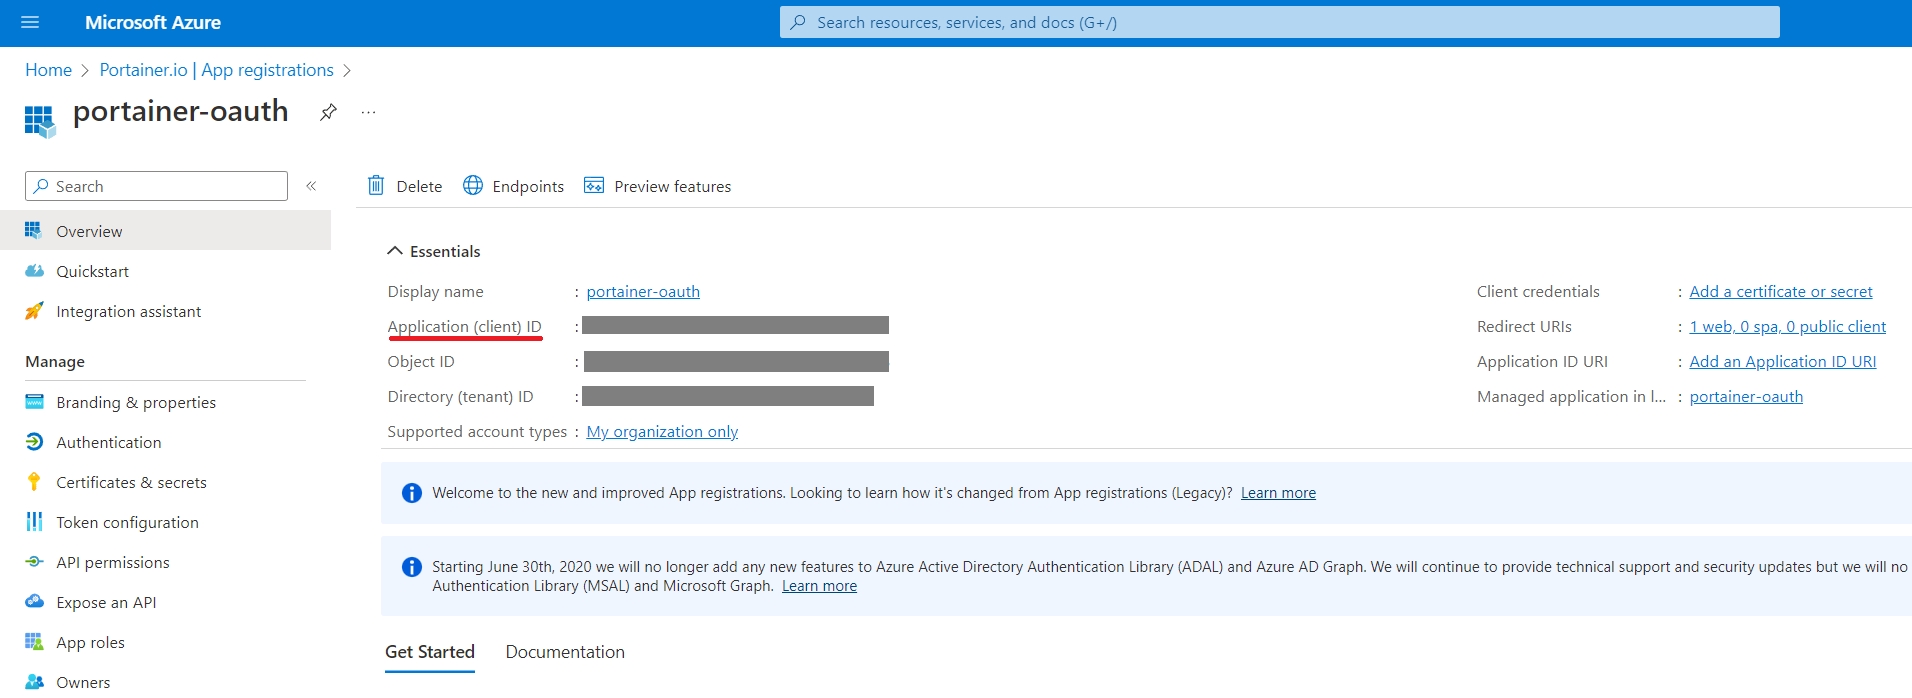
After creating the Registration, the screen below is displayed. Use the provided Application ID in the respective field in Portainer.
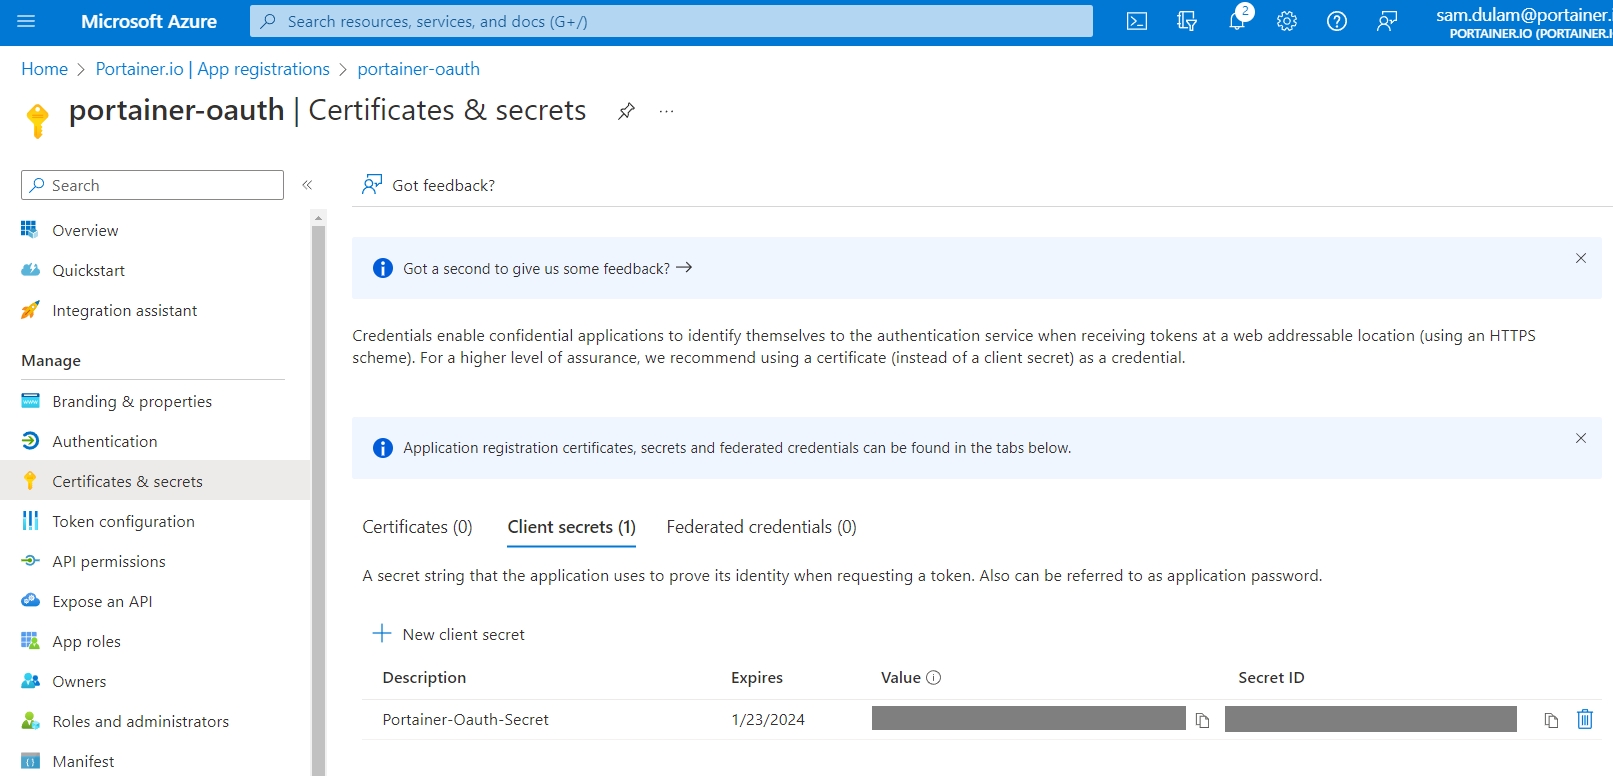
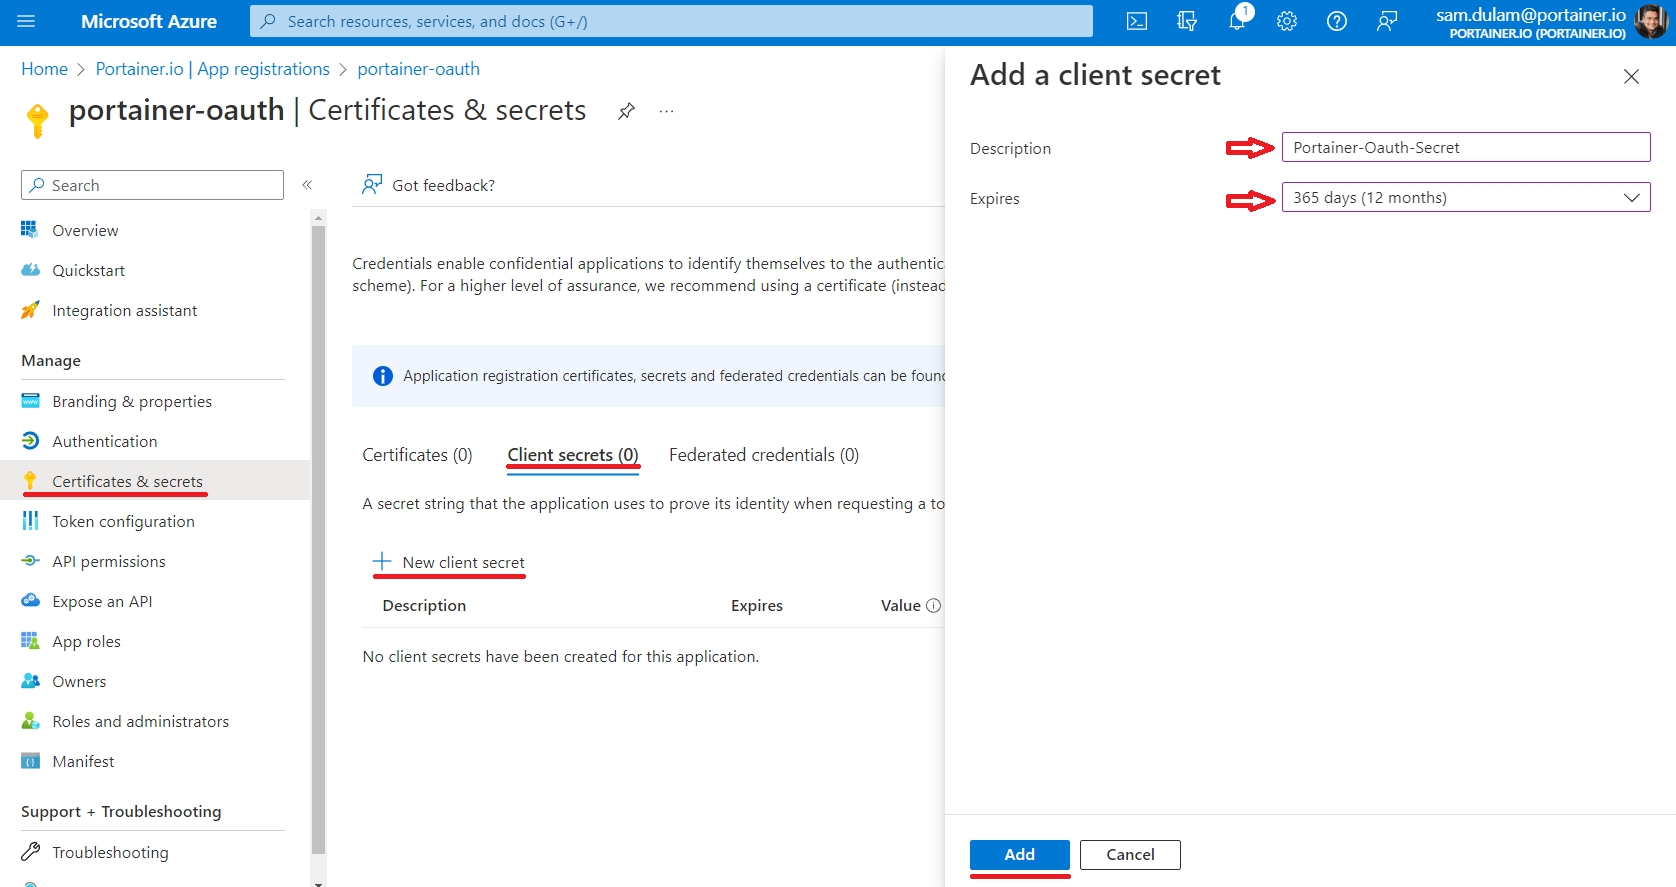
Click on Certificates & secrets then click Client secrets, Click on New client secret. Add Description and choose Expiry date, then Click Add.
The secret will then be generated for you. Use the Value as the Application key in the respective field in Portainer.
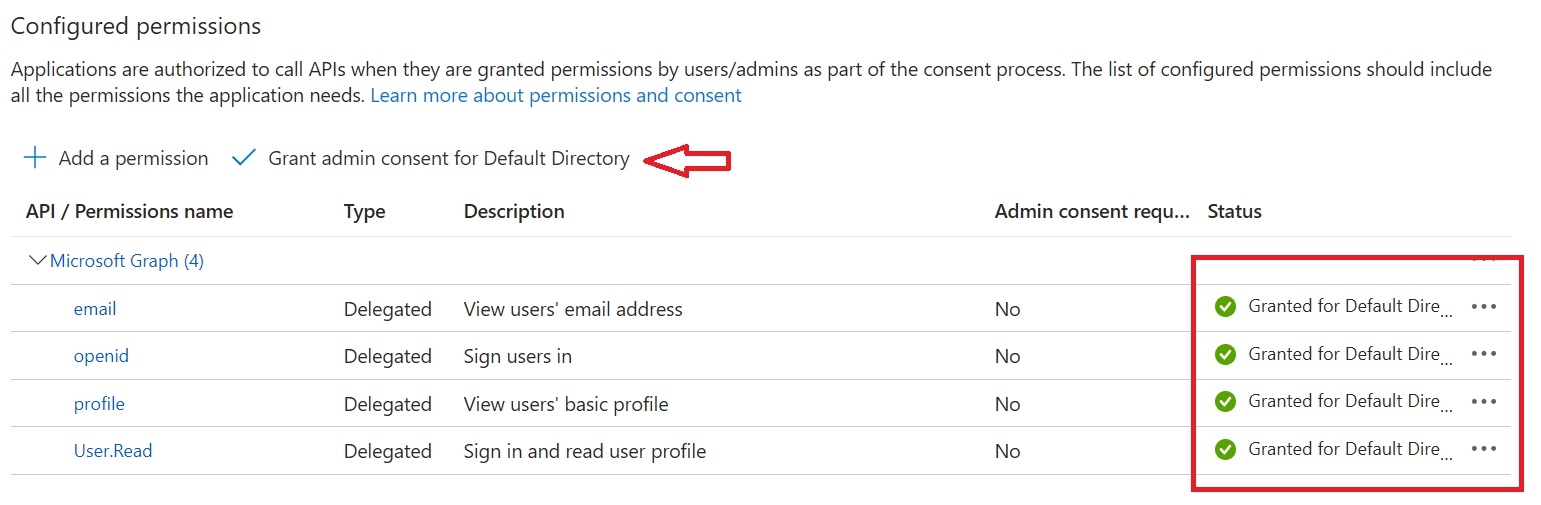
Click on API Permissions and Add a permission. Select Microsoft Graph in the Request API permissions screen. Select Delegated permissions and add
email, openid, profilepermissions.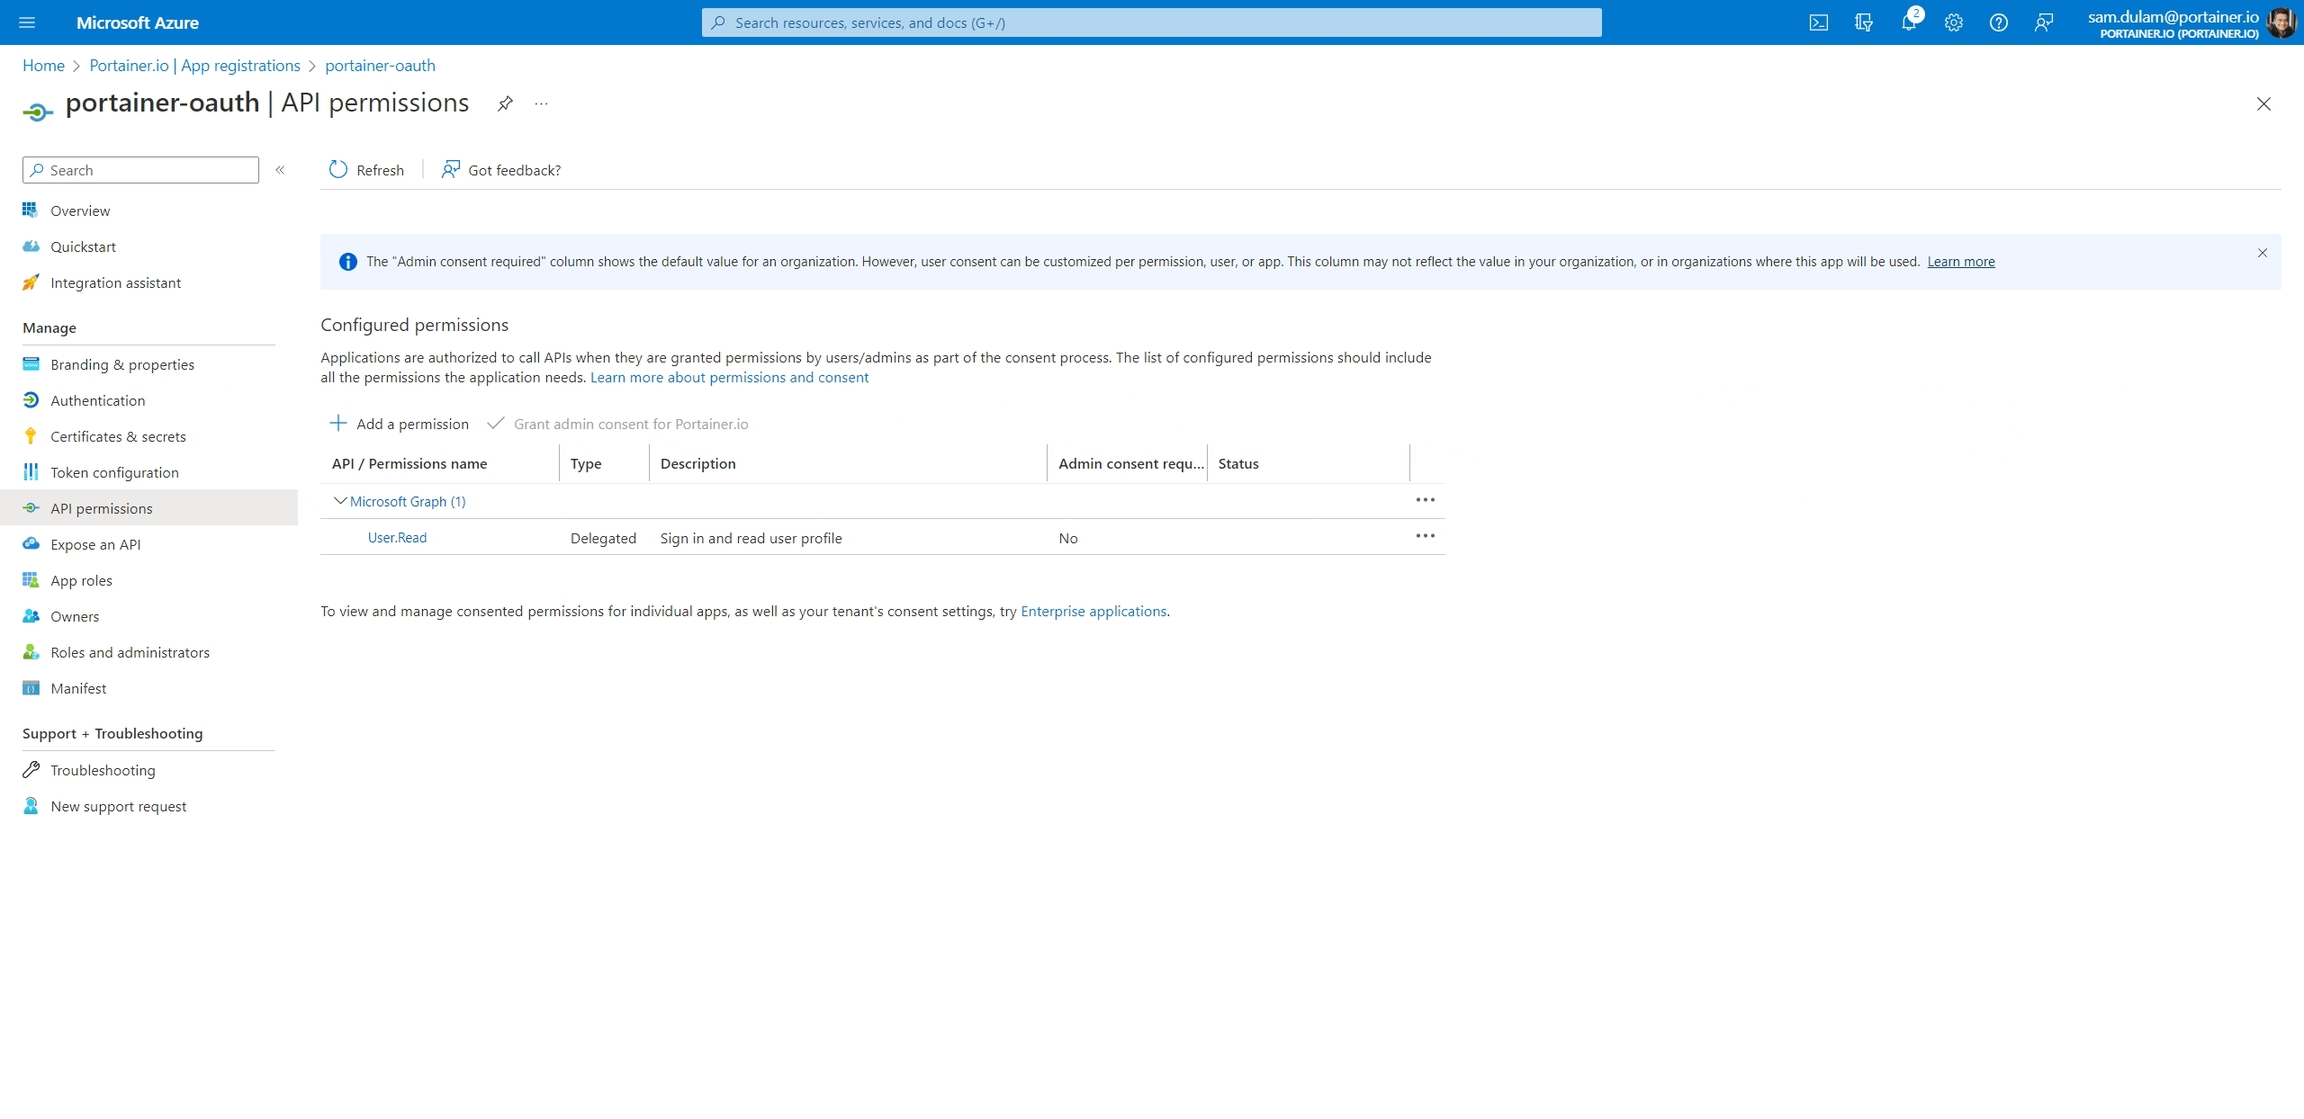
Make sure you Grant admin consent for Directory.
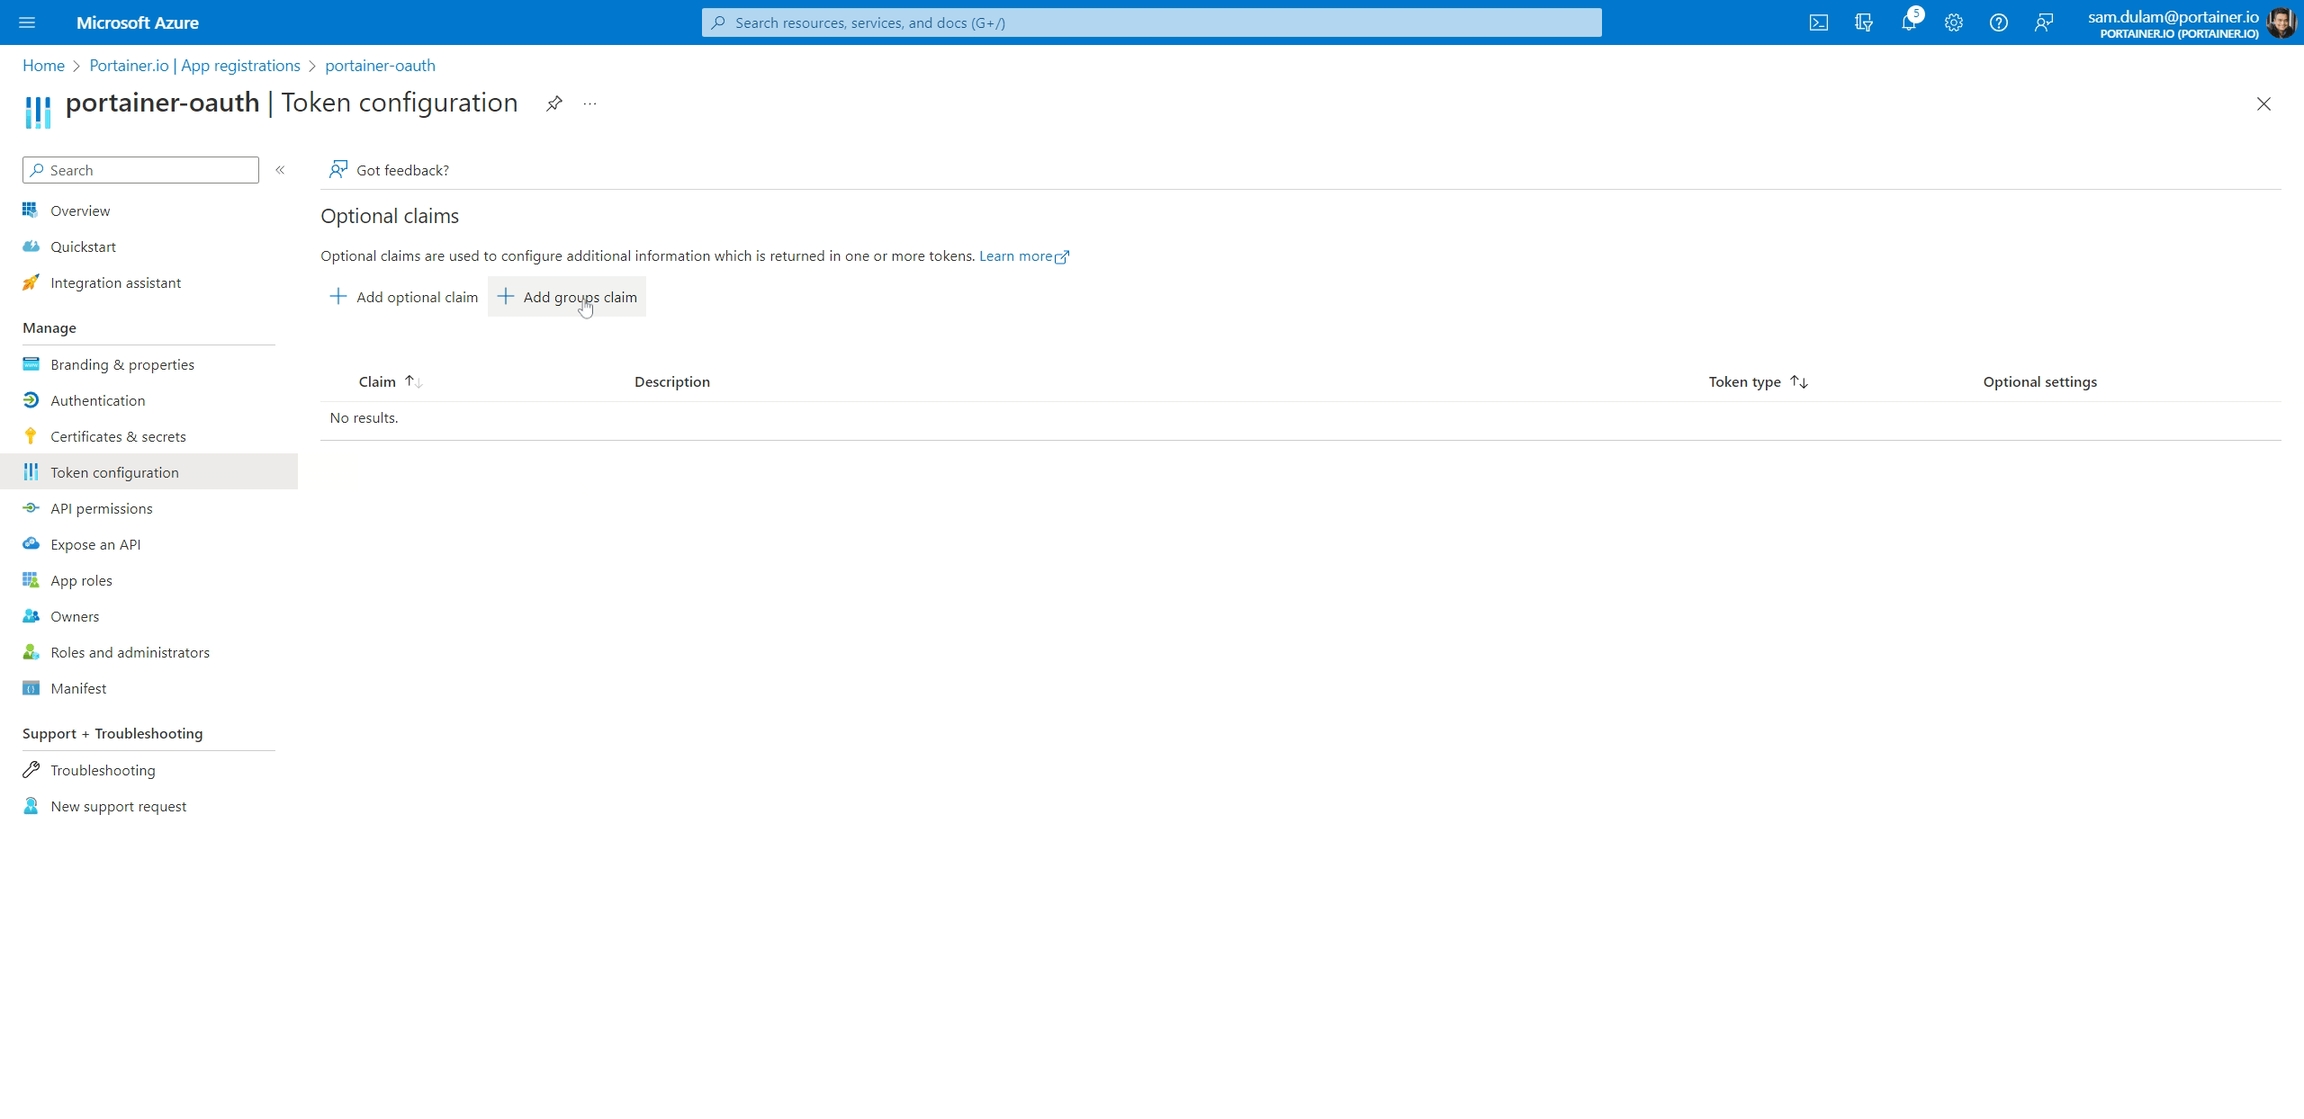
Optionally, to use Automatic Team Membership ability in Portainer, you need create groups claim. Click on Token Configuration and Add groups claim. Select Security Groups and click Add.
When you're finished, click Save settings.
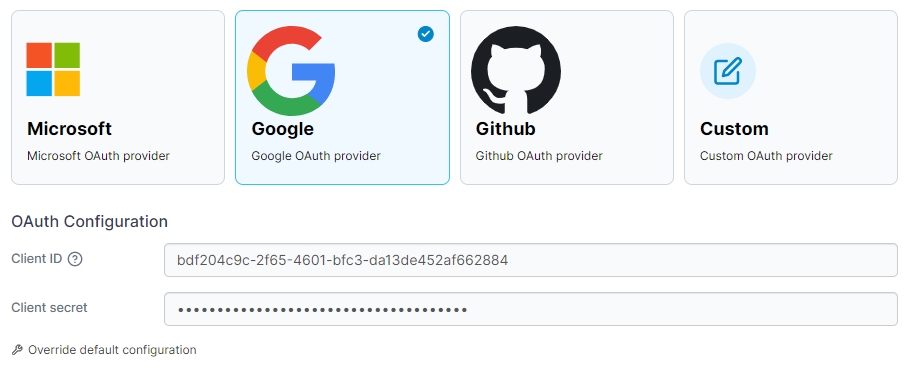
Google
Configure your OAuth provider using the table below as a guide.
Client ID
Enter the public identifier of the OAuth application.
Client secret
Enter the secret key for the OAuth application.
When you're finished, click Save settings.
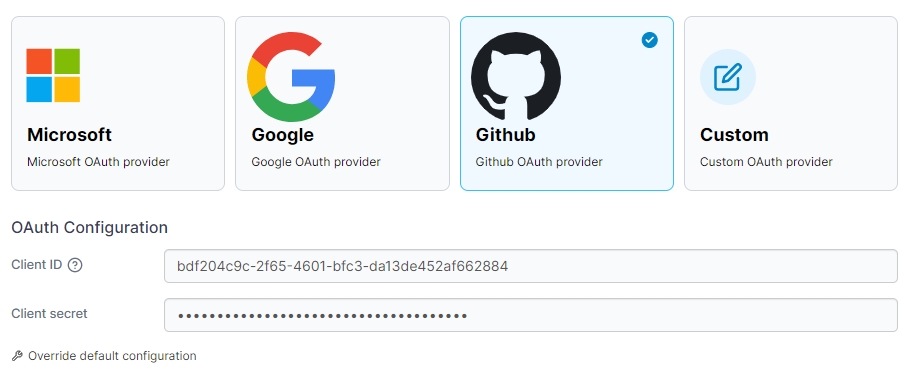
Github
Configure your OAuth provider using the table below as a guide.
Client ID
Enter the public identifier of the OAuth application.
Client secret
Enter the secret key for the OAuth application.
When you're finished, click Save settings.
Custom
Complete the OAuth Configuration section based on the table below.
Client ID
Enter the public identifier of the OAuth application.
Client secret
Enter the token access to the OAuth application.
Authorization URL
Enter the URL used to authenticate against the OAuth provider (will redirect users to the OAuth provider login screen).
Access token URL
Enter the URL used to exchange a valid OAuth authentication code for an access token.
Resource URL
Enter the URL used by Portainer to retrieve information about authenticated users.
Redirect URL
Enter the URL used by the OAuth provider to redirect users after they are successfully authenticated (also referred to as the callback URL). You should set this to your Portainer instance URL.
Logout URL
Enter the URL used by the OAuth provider to log users out.
User identifier
Enter the identifier that Portainer will use to create accounts for authenticated users. Retrieved from the resource server specified in the Resource URL field.
Scopes
Required by the OAuth provider to retrieve information about authenticated users. See your provider's own documentation for more information.
Auth Style
Specify how to send the client ID and client secret to the OAuth provider.

When you're finished, click Save settings.
Giving environment access to OAuth teams and users
Last updated
Was this helpful?