Add a new application using a manifest
Last updated
Last updated
There are two ways to add a new application: manually by using a form or automatically by using a manifest. This article explains how to add an application using a manifest.
Manifests aren't just for applications - you can also deploy namespaces, ingresses, ConfigMaps, secrets, volumes and more using a manifest.
Next, select your deployment method from the Deploy from section.
Then, select the namespace to deploy to and optionally provide a stack name for your deployment in the Deploy to section.
If you want to use namespaces defined in your manifest defines the namespace(s) you wish to deploy to, you can leave Namespace set to default and toggle on the Use namespace(s) specified from manifest option. This option is not available for deployments from Helm charts.
Your next options will depend on the deployment method you selected.
Use the Web editor to write or paste in your Kubernetes manifest.
You can search within the web editor at any time by pressing Ctrl-F (or Cmd-F on Mac).
When you're ready, click Deploy.
Enter the URL to your manifest file in the provided field.
When you're ready, click Deploy.
Use the provided fields to enter the details of your Git repository containing your Kubernetes manifests.
When an application is deployed from Git, Portainer will clone the entire Git repository as part of the deployment process. Ensure you have enough free space to accommodate this.
Portainer's Git deployment functionality does not currently support the use of Git submodules. If your repository includes submodules, they will not be pulled as part of the deployment. We hope to add support for submodules in a future release.
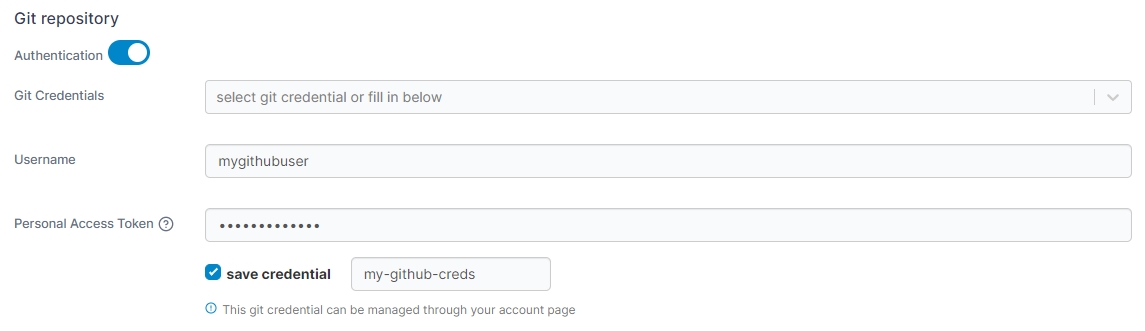
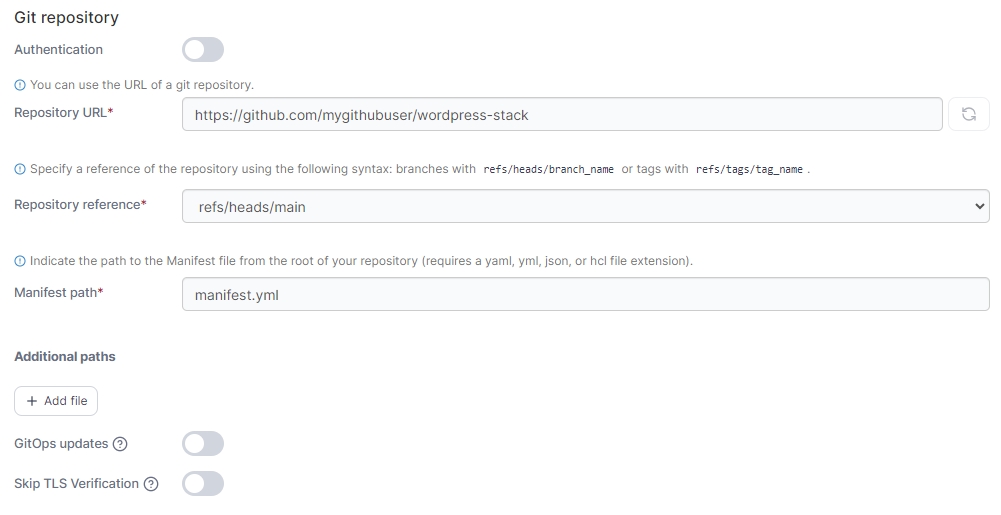
Authentication
Toggle this on if your repository requires authentication.
Git Credentials
If the Authentication toggle is enabled and you have configured Git credentials, you can select them from this dropdown.
Username
Enter your Git username.
Personal Access Token
Enter your personal access token or password.
Save credential
Check this option to save the credentials entered above for future use under the name provided in the credential name field.
Repository URL
Enter the repository URL. If you have enabled Authentication above the credentials will be used to access the repository. The below options will be populated by what is found in the repository.
Repository reference
Select the reference to use when deploying the stack (for example, the branch).
Manifest path
Enter the path to your manifest file relative to the root of your repository.
Additional paths
Click Add file to define additional manifests or compose files to process as part of the deployment.
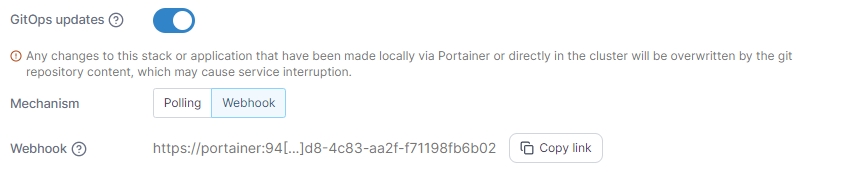
GitOps updates
Toggle this on to enable GitOps updates (see below).
Skip TLS Verification
Toggle this on to skip the verification of TLS certificates used by your repository. This is useful if your repo uses a self-signed certificate.
Enabling GitOps updates gives Portainer the ability to update your application automatically, either by polling the repository at a defined interval for changes or by using a webhook to trigger an update.
For more detail on how GitOps updates function under the hood, have a look at this knowledge base article.
If your application is configured for GitOps updates and you make changes locally, these changes will be overridden by the application definition in the Git repository. Bear this in mind when making configuration changes.
Mechanism
Choose from Polling or Webhook.
Fetch interval
When using the Polling method, choose how often you wish to check the Git repository for updates to your application.
Webhook
When using the Webhook method, this displays the webhook URL to use. Click Copy link to copy the webhook to your clipboard. For more on webhooks, refer to the webhook documentation.
Always apply manifest
Enable this setting to force the redeployment of your application (kubectl apply) at the specified interval (or when the webhook is triggered), overwriting any changes that have been made in the local environment, even if there has been no update to the application in Git. This is useful if you want to ensure that your Git repository is the source of truth for your applications and are happy with the local application being replaced.
If this option is left disabled, automatic updates will only trigger if Portainer detects a change in the remote Git repository.
When you're ready, click Deploy.
From the Template dropdown, select the custom template to use. Depending on the template, you may need (or be able) to set template variables that will adjust the deployment configuration. As an optional step, you can edit the template before deploying the application. If you have no custom templates you will be given a link to the Custom Templates section.
When you're ready, click Deploy.
Once you have selected a namespace for your Helm deployment you will need to specify a Name for your deployment. Then select a chart to use from the list provided. You can search within the list and filter by category.
Once you have selected a chart, Portainer will import the values.yaml file for the chart so you can configure any parameters required for the application. You can click the Show custom values option to expand the Web editor to make any changes.
When you're ready, click Install.