# Add a new container
From the menu select **Container instances** then click **Add container**.
Complete the configuration, using the table below as a guide:
| Field/Option | Overview |
| -------------- | -------------------------------------------------------------------------------------------------------------------------------------------------------------- |
| Subscription | Select the subscription you want to use for the container. |
| Resource group | If two or more resource groups exist, select the resource group to use. |
| Location | Select which Azure datacenter to run the container in. If virtual networks are available in a location, a count will be displayed alongside the location name. |
| Name | Give the container a descriptive name. |
| Image | Enter the name of the image that will be used to deploy the container. |
| OS | Select the OS (typically Linux or Windows). |
| Tags | Click **Add tag** to add a new tag, and provide the **Name** and **Value** for each tag as needed. Click the trash icon next to a tag to remove it. |
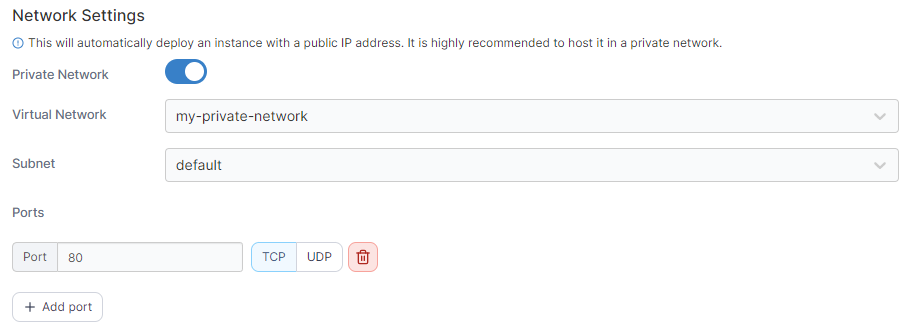
### Network Settings
In this section you can configure the network for your container as well as the ports to publish.
| Field/Option | Overview |
| --------------- | ----------------------------------------------------------------------------------------------------------------------------------------------------- |
| Private Network | Toggle this option on if you wish to use a pre-existing private network for your container. |
| Virtual Network | When Private Network is enabled, select the network to use. The selection will be limited on what is available in your selected location. |
| Subnet | When Private Network is enabled, select the subnet to use within your network (where relevant). |
| Ports | Enter the port number and select TCP or UDP to publish your container on the specified port and protocol. Click Add port to publish additional ports. |
### Container Resources
Here you can specify the resources available to your container.
| Field/Option | Overview |
| ------------ | ---------------------------------------------------------- |
| CPU | Define how many CPUs to allocate to the container. |
| Memory (GB) | Define how much memory in GB to allocate to the container. |
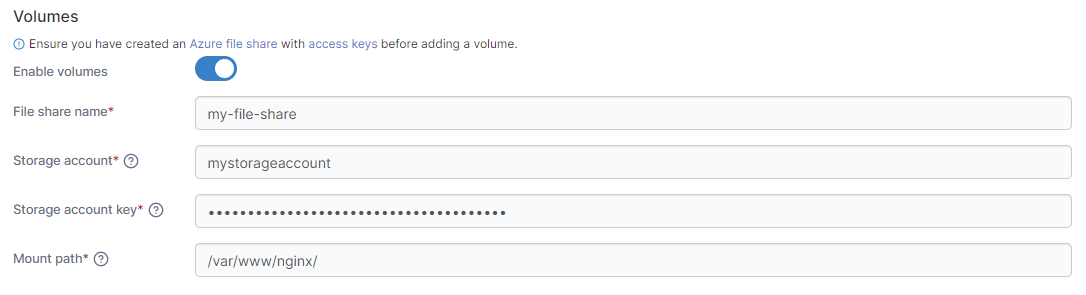
### Volumes
This section lets you specify a volume you want to be accessible from the container.
| Field/Option | Overview |
| ------------------- | -------------------------------------------------------------------- |
| Enable volumes | Toggle this option on to enable adding a volume to this container. |
| File share name | Enter the file share name for the volume. |
| Storage account | Enter the name of the storage account with access to the file share. |
| Storage account key | Enter the key for the above storage account. |
| Mount path | Enter the path within the container to mount the volume. |
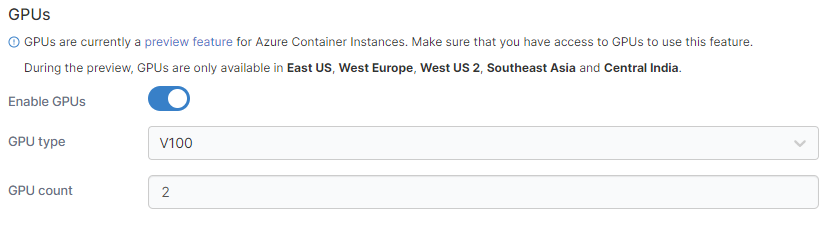
### GPUs
Here you can enable GPU support for the container and specify the GPU to use.
{% hint style="warning" %}
GPUs are currently a preview feature for Azure Container Instances and only available in select locations. Ensure you have access to GPUs before using this feature.
{% endhint %}
| Field/Option | Overview |
| ------------ | -------------------------------------------------------- |
| Enable GPUs | Toggle this on to enable GPU support for this container. |
| GPU type | Select the type of GPU to use. |
| GPU count | Enter the number of GPUs to use. |
When you're ready, click **Deploy the container**. When the deployment has finished, you'll see it in the list of Azure container instances.